| Line 45: | Line 45: | ||
|} | |} | ||
| − | The tracing task of the | + | The tracing task of the workout opened [http://oscada.org/en/development/tasks/posts/implementation_vnedrenie/openscada_adapting_to_the_android_os_tablet_asus_nexus_7_ii_workout/ here]. |
''' [[Special:MyLanguage/Sub-projects/Adaption_to_Android|Assembling and starting OpenSCADA into the environment of OS Android]] ''' | ''' [[Special:MyLanguage/Sub-projects/Adaption_to_Android|Assembling and starting OpenSCADA into the environment of OS Android]] ''' | ||
| + | |||
| + | ''' Installing of full-featured OS Linux and OpenSCADA starting '''<br/> | ||
''' Installing of full-featured OS Linux and OpenSCADA starting '''<br/> | ''' Installing of full-featured OS Linux and OpenSCADA starting '''<br/> | ||
| Line 53: | Line 55: | ||
The loader unlock and ROOT, from a Linux environment: | The loader unlock and ROOT, from a Linux environment: | ||
| − | * | + | * Enabling the debug mode of Android: |
| − | * | + | :* "Configuration" -> "About the device", five times click into item "Building number". |
| − | * | + | * Setting up of debugging through USB: |
| − | * | + | :* "Configuration" -> "Developers parameters", set proper property. |
| − | * | + | * Installing on PC the utility — "adb" (Android Debug Bridge). |
| − | ** | + | * Checking for connection to the tablet: |
| − | ** | + | :* connect USB-cable to PC |
| − | ** | + | :* call the command {{InLineCode|<nowiki>adb devices</nowiki>}} |
| + | * Unlocking the device: | ||
| + | ** enable the tablet with connection to PC by the USB-cable and holding by buttons "Power" and "Sound lower" up to the bootloader screen appear; | ||
| + | ** check for the boot-loader visibility — {{InLineCode|<nowiki>sudo fastboot devices</nowiki>}} | ||
| + | ** unlock — {{InLineCode|<nowiki>fastboot oem unlock</nowiki>}} | ||
| + | |||
* Load and flash "TWRP recovery": load [http://techerrata.com/browse/twrp2/flo here], then flash it by command "$ fastboot flash recovery /Path-to-TWRP.img" | * Load and flash "TWRP recovery": load [http://techerrata.com/browse/twrp2/flo here], then flash it by command "$ fastboot flash recovery /Path-to-TWRP.img" | ||
* Enter to the "Recovery" mode of the loader and provide access ROOT: select "Reboot" -> "Recovery" -> "ROOT", then "Reboot" -> "Sytem". | * Enter to the "Recovery" mode of the loader and provide access ROOT: select "Reboot" -> "Recovery" -> "ROOT", then "Reboot" -> "Sytem". | ||
Revision as of 09:50, 29 October 2023
|
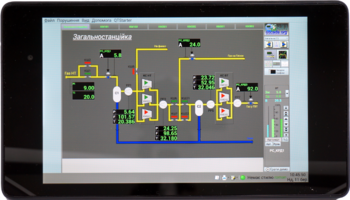
Tablet computer Asus Nexus 7 II (2013)
|

|
Key specification of the tablet:
| Hardware platform: | ARM Cortex-A15 [ARMv7] |
| Central processor: | Four-core Qualcomm Snapdragon APQ8064-1AA 1500 MHz |
| Operational memory: | 2 GiB DDR3 |
| Permanent memory: | 32 GiB |
| Video subsystem: | 400 MHz quad-core Adreno 320 |
| Screen: | IPS, 1920x1200 px (323 ppi) |
| Hardware | CPU | Entry into JavaLikeCalc, us | Operation sin(Pi) [in JavaLikeCalc], us | Operation pow(Pi,2) [in JavaLikeCalc], us | Model AGLKS [Vision, main mnemo], %(core) | Extra tests and notes |
|---|---|---|---|---|---|---|
| Google Asus Nexus7 II | ARM Cortex-A15, Qualcomm Snapdragon APQ8064-1AA, 28nm, 1.5 GHz, 4 Cores | 0.321 | 0.134 [0.239] | 0.122 [0.264] | 54 [82] |
armv7-a, Soft, VFP, Extra tests. |
The tracing task of the workout opened here.
Assembling and starting OpenSCADA into the environment of OS Android
Installing of full-featured OS Linux and OpenSCADA starting
Installing of full-featured OS Linux and OpenSCADA starting
For different OS installing you need to unlock the loader and for original Android saving you need ensure multiboot.
The loader unlock and ROOT, from a Linux environment:
- Enabling the debug mode of Android:
- "Configuration" -> "About the device", five times click into item "Building number".
- Setting up of debugging through USB:
- "Configuration" -> "Developers parameters", set proper property.
- Installing on PC the utility — "adb" (Android Debug Bridge).
- Checking for connection to the tablet:
- connect USB-cable to PC
- call the command adb devices
- Unlocking the device:
- enable the tablet with connection to PC by the USB-cable and holding by buttons "Power" and "Sound lower" up to the bootloader screen appear;
- check for the boot-loader visibility — sudo fastboot devices
- unlock — fastboot oem unlock
- Load and flash "TWRP recovery": load here, then flash it by command "$ fastboot flash recovery /Path-to-TWRP.img"
- Enter to the "Recovery" mode of the loader and provide access ROOT: select "Reboot" -> "Recovery" -> "ROOT", then "Reboot" -> "Sytem".
- Install "SuperSU" for you will be proposed.
To provide the multiboot let install "MultiROM Manager" from "Play Market".
Due to this device is supported by Google, you are allowed to update the Android OS up to versions 5 and 6 for this you can read and download suitable image from the "Factory Images for Nexus and Pixel Devices" page.
